03. Project Instructions
Traffic Sign Classifier Project
In this project, you will use what you've learned about deep neural networks and convolutional neural networks to classify traffic signs. Specifically, you'll train a model to classify traffic signs from the German Traffic Sign Dataset .
Running the Traffic Sign Classifier in your local machine
Set Up Your Environment
CarND Starter Kit
Install the car nanodegree starter kit if you have not already done so: carnd starter kit
TensorFlow
If you have access to a GPU, you should follow the TensorFlow instructions for installing TensorFlow with GPU support .
Once you've installed all of the necessary dependencies, you can install the
tensorflow-gpu
package:
pip install tensorflow-gpu
Amazon Web Services
Instead of a local GPU, you could use Amazon Web Services to launch an EC2 GPU instance. (This costs money.)
-
Follow the Udacity instructions
to launch an EC2 GPU instance with the
udacity-carndAMI. - Complete the Setup instructions.
Start the Project
- Download the dataset . This is a pickled dataset in which we've already resized the images to 32x32.
- Clone the project and start the notebook.
git clone https://github.com/udacity/CarND-Traffic-Sign-Classifier-Project
cd CarND-Traffic-Sign-Classifier-Project-
Launch the Jupyter notebook:
jupyter notebook Traffic_Sign_Classifier.ipynb - Check out the project rubric
- Follow the instructions in the notebook
- Write your project report
Running Traffic Sign Classifier in workspaces
This workspace is designed to be a simple, easy to use environment in which you can code and run the Traffic Sign Classifier project. The project repo already include all you need to complete this project.
For tips on workspace use, please review the Workspaces lesson.
Accessing and using the workspace:
- This notebook contains all the dependencies needed to run your code without additional setup.
- Go to the workspace node and click on JUPYTER notebook.
- Complete the project using the instructions in the notebook
- The project repo is already in the workspace. To see other files in the repo click on the JUPYTER icon. This will expose the root directory. From there click on the project folder.
-
The data (
train.p,test.p,valid.p) is already in the workspace, one level above the notebook. Access it using../data/filename, for example,../data/train.p.
Running this workspace with GPU
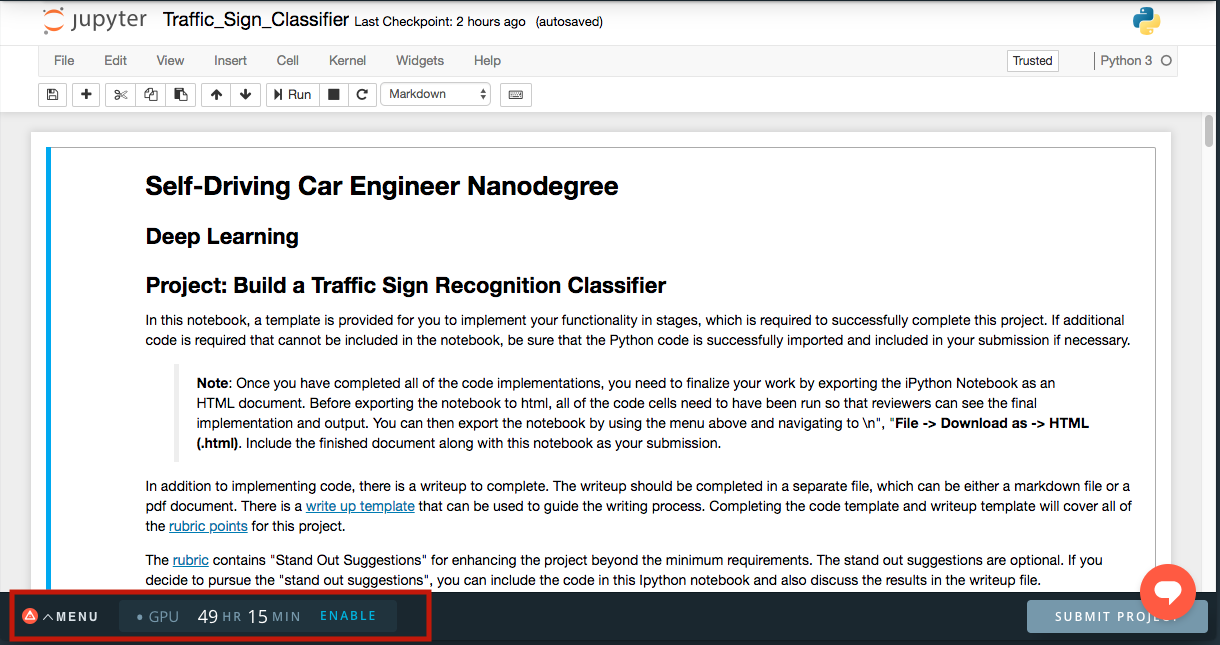
In this workspace you can run your code using a GPU! Awesome, right? However, your time is limited to 50 hrs in total per account , which means across any ND or course in Udacity, so please use them wisely!
Activate and deactivate the GPU by clicking on the button at the bottom of the notebook.
Only enable it when you want to test your code. You will also see the time remaining.
Submission
Before submitting, make sure your project covers all of the rubric points, which can be found here .
Project submission if you run the project on your local machine
Include a zipped file with your submission with:
- The Traffic_Sign_Classifier.ipynb notebook file with all questions answered and all code cells executed and displaying output.
- An HTML or PDF export of the project notebook with the name report.html or report.pdf.
- Any additional datasets or images used for the project that are not from the German Traffic Sign Dataset.
- Your writeup report as a markdown or pdf file
-
Please do not include project data (
train.p,test.p,valid.p) with your submission.
Alternatively, you may submit a link to your GitHub repo for the project.
In either case, remember to include example images for each stage of your pipeline and your final output video in your submission .
Project submission when using the workspaces:
Make sure your workspace contains:
- The Traffic_Sign_Classifier.ipynb notebook file with all questions answered and all code cells executed and displaying output.
- An HTML or PDF export of the project notebook with the name report.html or report.pdf.
- Any additional datasets or images used for the project that are not from the German Traffic Sign Dataset.
- Your writeup report as a markdown or pdf file
When you are ready to submit your project, just click the button SUBMIT PROJECT and follow the instructions to submit!

Commit to GitHub
Students are highly encouraged to commit their project to a GitHub repo. To do this, you must change the upstream of the current repository and add your credentials. We have supplied a bash script to help you do this. Please open up a terminal, navigate to the project repository, and enter:
./set_git.sh
, then follow the prompts. This will set the upstream remote to your own repository and add your email and username to the git configuration. At this time we are not configuring passwords, so you will need to enter your username and password for each push. Since credentials are not persistent, it will be necessary to run this script each time you open, refresh, or reset the workspace.
Using GitHub and Creating Effective READMEs
If you are unfamiliar with GitHub , Udacity has a brief GitHub tutorial to get you started. Udacity also provides a more detailed free course on git and GitHub .
To learn about README files and Markdown, Udacity provides a free course on READMEs , as well.
Project Support
If you are stuck or having difficulties with the project, don't lose hope! Remember to talk to your mentors and fellow students in your Study Group, as well as ask (and answer!) questions on Knowledge tagged with the project name. We also have a previously recorded project Q&A that you can watch here !